Skip to Main Content

Map A Story

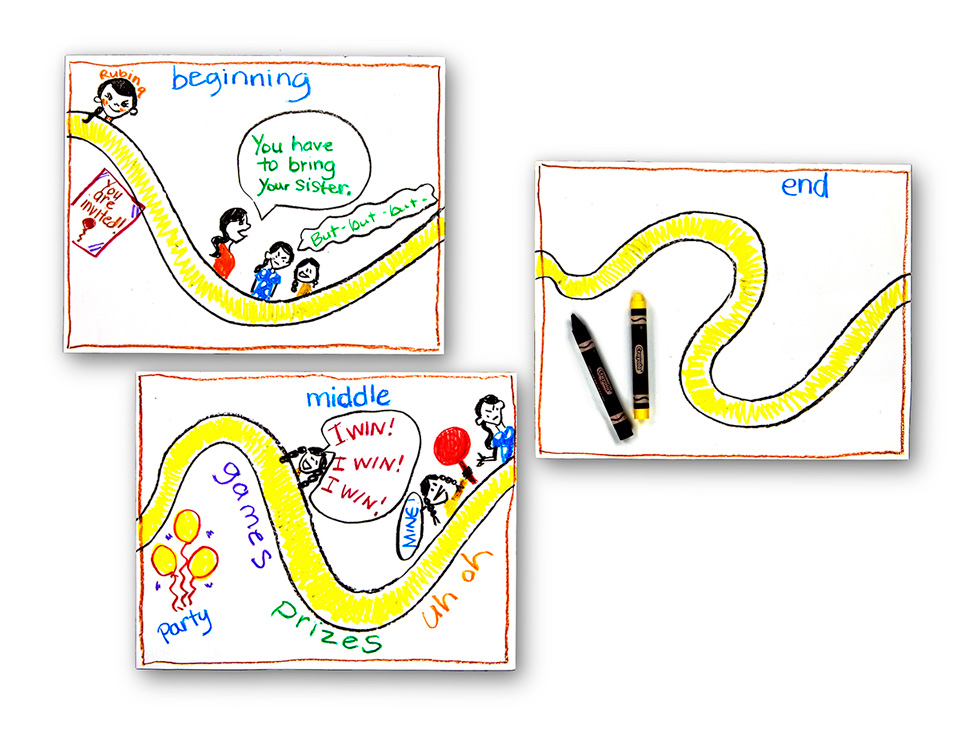
Stories have a beginning, a middle and an end. Students will read or listen to a story and work collaboratively to create a map of the story's progression.

Lesson Plan

Supplies Needed

Gather all the supplies needed to bring your craft ideas to life! From paints and markers to glue and scissors, our crafts section has everything to spark creativity and make every project truly special.

  • Dry Erase Board

Steps

  • Step 1

    Story mapping is a great way for students to visualize characters, events, and settings. It increases children's ability to organize their thoughts and to comprehend how the characters and events are interrelated. Read a book to the class such as "Enemy Pie" by Derek Munson," "The Plot Chickens" by Mary Jane Auch, or any story of your choice with a developed plot line. 

  • Step 2

    Have children form small groups and provide each one with a dry-erase board and dry-erase crayons. If there aren't enough boards, regular paper and crayons will do. Ask the children to discuss the progression of the story and decide which part or parts to present from the beginning, middle, and end in a story map. Then have each student create a drawing of one of the scenes. They can also include plot points or brief dialogues if they wish.

  • Step 3

    Have students arrange themselves in order and present their story maps to the class.

Standards

LA: Add drawings or other visual displays to written text to clarify ideas, thoughts, and feelings. 

LA: Describe the overall structure of a story, including describing how the beginning introduces the story and the ending concludes the action.

Adaptations

Encourage children to write an original story and then depict it in a story map using illustrations and a few words.

Have students mix up the order of their story map pictures and then make up a silly story using the new order.