Skip to Main Content

Telling Text

Word Processing has come a long way since its inception. Now there are so many font choices that choosing the best font for the job is something we need to pay big attention to. This lesson takes that one step farther where students create their art based on a word.

Steps

  • Step 1

    This lesson is a great way to incorporate visual interpretation with written text, and you can base it on a recent storybook that the class has read together. A simple text such as is in the book "I am Water" by Jean Marzollo, illustrated by Judith Moffatt lends itself as a very literal example, and may even be a good level for the class. This book is about water and what humans and animals use it for.

  • Step 2

    After reading the book to the class, brainstorm with children one single word could possibly sum up an entire book. You will undoubtedly get the word 'water.' This can be an appropriate starting point. Even if your class is above this level, you can use this as an example and challenge them to come up with any OTHER word when they actually execute the project.

  • Step 3

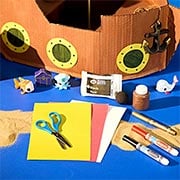
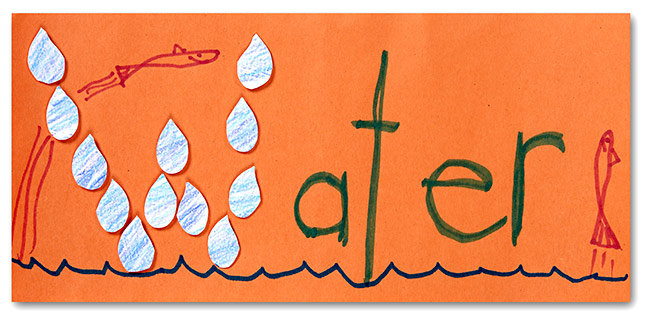
    Demonstrate how to use construction paper and Crayola Markers to write/draw their selected word as large as they can, but allowing extra space around one letter; the one that will be the focus of this word. It may be the first letter, or may not, depending on the word and its significance to the book. Next, students decide how they can best illustrate the meaning of their word in relation to the content of the book.

  • Step 4

    Reference the illustrations from the read aloud book. I Am Water. Use small pieces of recycled cardboard to get a similar effect. The visible shape will be that of water droplets. This is intrinsically a physical shape of water and is used throughout the book.

  • Step 5

    The "W" in water will be used as the stand out letter in student artwork. To follow the illustrator's style, demonstrate for children how to use interesting textures and added colors on paper. To create dimensional layers, use small strips of recycled cardboard and cut into small rectangles. These are then glued onto the back of the drop shapes.

  • Step 6

    These pieces of cardboard are glued on top of the drawn letter, or word if appropriate, that was written very large on construction paper. Students may wish to add additional images around the edges or near other letters. These additional images should not distract from the focus word.

  • Step 7

    Display these all together so viewers can see the many creative ways in which this project can be executed!

Standards

LA: Use information gained from the illustrations and words in a print or digital text to demonstrate understanding of its characters, setting, or plot.

LA: Determine the meaning of words and phrases as they are used in a text, distinguishing literal from nonliteral language.

LA: Explain how specific aspects of a text’s illustrations contribute to what is conveyed by the words in a story (e.g., create mood, emphasize aspects of a character or setting).

VA: Elaborate on an imaginative idea.

VA: Make art or design with various materials and tools to explore personal interests, questions, and curiosity.

VA: Explore and invent art-making techniques and approaches.

Adaptations

Engage a class in this project but have them illustrate their name (first or last). They could use images that their family genealogy reveals is the origin of their name.

Have students work in small groups and they can create a very large version of this project on posterboard, maybe using the school or town name, and where each letter is based on one thing your area is known for.