Skip to Main Content

Starry Starry Sky

Introduce children to the mysteries of the night sky with this imaginative storytelling lesson that focuses on the formation of constellations.

Lesson Plan

Supplies Needed

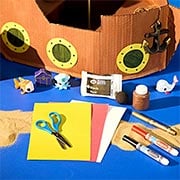
Gather all the supplies needed to bring your craft ideas to life! From paints and markers to glue and scissors, our crafts section has everything to spark creativity and make every project truly special.

  • Container of Water
  • Paper Towels
  • Plastic Wrap
  • Recycled Newspaper
  • Reference Materials
  • Ruler
  • White Paper

Steps

  • Step 1

    Create a display of images of the night sky, photographs as well as artistic interpretations. Gather children around the display and ask them to think about times they have looked at the night sky. What are all those twinkling lights seen? Introduce the idea of stars and planets. Ask if they have ever done dot-to-dot drawings in an activity book. Now have them look at one of the night sky photographs again and imagine what shapes they might make by drawing lines between the stars.

  • Step 2

    Inform students that the night sky we see now is much the same as the sky that people hundreds of years ago saw. Ask if anyone has heard myths that the ancient Greeks and Romans made up about the shapes they saw in the stars. Explain that the Greeks and Romans called these shapes that were formed by groups of stars "constellations". Discuss the origin of the word by telling them that the Latin (Roman) word for "star" was "stella" and their word for coming together was "con" or "com", thus a group of stars that came together to form a shape was a "constellation."

  • Step 3

    Tell or read one of the myths associated with a constellation. Two possible resources are "Once Upon a Starry Night: A Book of Constellations" or "Zoo in the Sky: A Book of Animal Constellations" both by Jacqueline Mitton.

  • Step 4

    Inform students they will have an opportunity to create night skies and constellations of their own using watercolors. Help students cover their desks with recycled newspaper. Distribute pieces of heavy white paper, Crayola® Educational Watercolors, brushes, containers of water, paper towels, and pieces of plastic wrap.

  • Step 5

    Ask students to look at the night sky pictures once again. What colors do they see? Is the sky a solid black, or is it a mix of colors? Demonstrate how to create a realistic sky effect by mixing various shades of blues, purples, greens and other colors. Explain that black is actually the absence of color and that most of what they see is actually a mix of colors. Show them how to lighten a color by adding more water. Then demonstrate how to create texture by pressing a piece of crumpled plastic wrap into wet paint and then lifting it off. Remind them not to overwork their skies or they will become muddy. While the sky paintings dry, invite students to paint a second piece of paper with lighter colored paints and fresh, clean water. When this piece has dried they will cut 10 - 12 "stars" from it, so suggest that they use very light or bright colors that will contrast with their dark skies. Set these paintings aside to dry, too, possibly overnight.

  • Step 6

    When the watercolors have dried, distribute a pair of Crayola scissors and a Glue Stick to each student. After looking at the stars in the photo display, invite students to cut 10-12 "stars" from their lighter colored papers. Remind them that stars come in different shapes and sizes and are not the five pointed symbols we often see in pictures.

  • Step 7

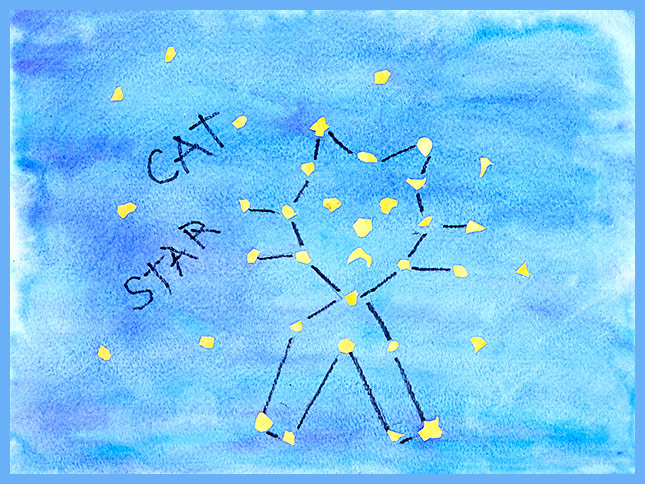
    Once each student has a collection of stars, invite them to scatter their stars across their skies. Do they seem to form any specific shapes? Encourage students to move their stars around until they do "see" an interesting shape. Can they think of a story that might go with that shape? If so, invite them to glue the stars to the sky and connect them with lines using a contrasting color of a Crayola Marker.

  • Step 8

    Suggest to students that they title their creations and display them on a wall or bulletin board in the classroom.

  • Step 9

    Remind them of the myth you recently read and discuss various storytelling techniques. Point out that a story usually begins with some kind of problem and ends when that problem is resolved. The end might be a "good" one, but not necessarily so. It might be a sad ending, but the original problem should be resolved in some way so the reader is not left hanging.

  • Step 10

    Ask students to think about a problem the figure in their constellation might face and what could be done about it. How might the story end? Suggest that students gather in small groups and tell each other their stories.

Standards

LA: Recount stories, including fables and folktales from diverse cultures, and determine their central message, lesson, or moral.

VA: Understand that people from different places and times have made art for a variety of reasons.

LA: Describe the overall structure of a story, including describing how the beginning introduces the story and the ending concludes the action.

LA: Determine the meaning of general academic and domain-specific words and phrases in a text relevant to a grade 3 topic or subject area.

LA: Write narratives in which they recount a well elaborated event or short sequence of events, include details to describe actions, thoughts, and feelings, use temporal words to signal event order, and provide a sense of closure.

MATH: Compose two-dimensional shapes (rectangles, squares, trapezoids, triangles, half-circles, and quarter-circles) or three-dimensional(cubes, right rectangular prisms, right circular cones, and right circular (cylinders) to create a composite shape, and compose new shapes from the composite shape.

SCI: Use observations of the sun, moon, and stars to describe patterns that can be predicted.

SS: Describe ways in which language, stories, folktales, music, and artistic creations serve as expressions of culture and influence behavior of people living in a particular culture.

VA: Create personally satisfying artwork using a variety of artistic processes and materials.

VA: Identify and explain how and where different cultures record and illustrate stories and history of life through art.

Adaptations

To incorporate some mathematical concepts into this lesson, encourage children to find geometric shapes within their constellations. Provide tracing paper for them to lay over their constellations and encourage them to draw lines connecting more of the stars to form triangles, squares, rectangles, or other geometric shapes.

Extend the storytelling into a writing activity by inviting students to use Crayola Markers to record their stories and display them with their constellations.

As part of a science lesson, introduce children to the work of Carol Sagan by reading the book "Star Stuff: Carol Sagan and the Mysteries of the Universe" by Sephanie Sisson.