Skip to Main Content

Traditional African Masks

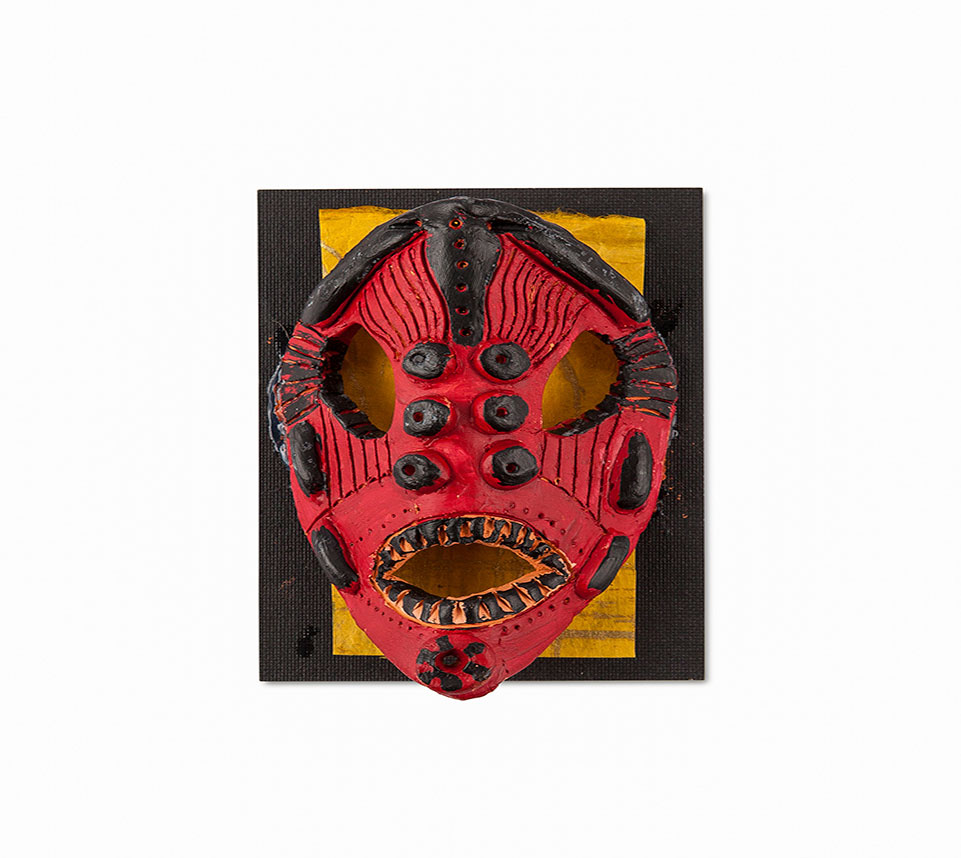
Masks are central to the cultural and spiritual traditions of many African societies. Students will explore the history and meaning of several masks before they create a replica of one.

Lesson Plan

Supplies Needed

Gather all the supplies needed to bring your craft ideas to life! From paints and markers to glue and scissors, our crafts section has everything to spark creativity and make every project truly special.

  • Paper Clip(s)
  • Plastic Wrap
  • Recycled Cardboard

Steps

  • Step 1

    Masks are a strong cultural universal. Nearly any culture that is being studied in history, social studies and art will uncover the use of masks in cultural celebrations, religion and ceremony. For this lesson students study and create clay masks in the style of West African people. These masks can be traced back well before the Paleolithic times. As objects of art they were assembled from a variety of materials. Encourage students to research and engaging in conversations about masks and mask-making to bring about a greater understanding of the people of any specific culture.

  • Step 2

    Once research is complete, students will be making their own masks. The material being used will be Terra Cotta Crayola® Air Dry Clay. Using proportions to create template students will emulate the strong, symmetrical balance of West African mask. In preparation for this lesson, students will need to build a “hump mold” to create their own masks.

  • Step 3

    Making the hump mold begins with cutting recycled pieces of cardboard from boxes, etc. Specifically, students will need pieces sized 6” long and 3” high with a 4.5” wide base (15.24 cm long, 7.62 cm high with a 11.43 cm base).

  • Step 4

    Fold the cardboard so that it takes on the shape of a tent, or triangle. Use strong tape (masking, duct tape or shipping tape) to tape the mold so it cannot release from the triangular shape.

  • Step 5

    Next, cover the entire mold with a piece of plastic wrap. Tape the wrap into place to avoid slipping.

  • Step 6

    With hump molds set aside, present images of masks from the country of Ghana. Discuss the features that show up consistently within the images, such as symmetry, line design, proportion and color. Provide time for students to make sketches of the images in their journals or sketchbooks.

  • Step 7

    Distribute white drawing paper cut to the dimensions that will be used for the clay mask: 4.25” wide by 5” long (11 cm x 12 cm). Students fold the paper in half vertically, then horizontally. Open the paper and fold the top edge to the middle, the bottom edge to the middle. Unfold again. The paper template now has six sections into which the student will draw the proportional features of the mask.

  • Step 8

    Review the images and sketches discussed earlier in the lesson. Students draw a mask design that represents those shown earlier. When the drawing is complete within the template, students may outline the design using black or dark crayon, add lines of texture and design, and fold in half vertically to change the shape for the top of the mask or chin.

  • Step 9

    Provide each student with a ball of Crayola Air Dry Clay about the size of a tangerine. Students may roll the ball flat with a rolling pin or simply press it flat with the palms of their hands. The clay should never be pressed thinner than ½ inch (1 cm) to keep it strong and unlikely to break apart. While clay is wet, add water to soften or join pieces. This product works with traditional techniques (coil, slab, pinch and score and weld). Rubber stamps or textured materials can be used to make impressions. Press beads, small stones or other decorative items directly into clay. Pieces greater than 1/2” (1.27 cm) thick are more durable and less fragile than thinner pieces.

  • Step 10

    Students lay their template on top of the clay slab. Go over the lines on the template with pencil. Students trim and decorate their clay slab after they remove the paper template. Craft sticks and assorted materials work well for modeling the clay. When all of the line designs are in place, eye holes are cut out as well as holes on the right and left sides students will place the slab onto the hump mold to dry. When placing the slab on the hump mold, small lines and cracks may appear at the center, students may smooth the lines away with a damp finger.

  • Step 11

    When dry, pieces may be painted with Crayola Tempera, Acrylic or Watercolor Paints. It takes about 2 – 3 days to dry depending on the thickness of the clay mask. For a gloss finish use Crayola Model Magic Glaze. Thread wire or raffia through the holes made along the sides of the mask to hang. Masks can also be mounted on cardboard or matt board for display.

Standards

LA: Analyze how a text makes connections among and distinctions between individuals, ideas, or events.

VA: Apply relevant criteria from traditional and contemporary cultural contexts to examine, reflect on, and plan revisions for works of art and design in progress.

VA: Collaboratively prepare and present selected theme-based artwork for display, and formulate exhibition narratives for the viewer.

VA: Distinguish different ways art is used to represent, establish, reinforce, and reflect group identity.

LA: Integrate and evaluate information presented in diverse media and formats, including visually, quantitatively, and orally.

LA: Present claims and findings, emphasizing salient points in a focused, coherent manner with relevant evidence, sound valid reasoning, and well-chosen details; use appropriate eye contact, adequate volume, and clear pronunciation.

MATH: Use ratio reasoning to convert measurement units; manipulate and transform units appropriately when multiplying or dividing quantities.

SS: Compare ways in which people from different cultures think about and deal with their physical environment and social conditions.

SS: Give examples and describe the importance of cultural units and diversity within and across groups.

SS: Compare and contrast different stories or accounts about past events, people, places, or situations, identifying how they contribute to our understanding of the past.

SS: Identify and use various sources for reconstructing the past, such as documents, letters, diaries, maps, textbooks, photos, and others.

VA: Develop criteria to guide making a work of art or design to meet an identified goal.

Adaptations

The content from this lesson can be used in a two dimensional project. Instead of making a West African style mask from clay, create the same style by collaging various colors of paper onto cardboard. Cut up small pieces of colored black and red paper from images in magazines; allow some words to be visible within the composition of the collage.

Compare and contrast, assign students different, diverse cultures from all over the world. Have the students study the styles of masks from Asian, African, European, Latin, etc., cultures. Use the format from the lesson above to create the masks. Exhibit and discuss the differences and similarities in styles, purpose, materials.

Work collaboratively as a class to set up an exhibit of the completed masks. Create artist’s statements that reflect upon what each artist has learned, personally, about the artistry involved in the West African style (or other cultures if used). Create posters, announcements, invite other classrooms, parents and community leaders.