Skip to content
Would you like to visit your local site?

Australia

We noticed you’re located in New Zealand. There isn't a local site available. Would you like to visit the Australian site?

Australia

Would you like to visit your local site?

Belgium

Would you like to visit your local site?

Canada

Would you like to visit your local site?

China

Would you like to visit your local site?

Italy

Would you like to visit your local site?

Mexico

Would you like to visit your local site?

Netherlands

Would you like to visit your local site?

UK

Would you like to visit your local site?

France

Would you like to visit your local site?

Japan

Skip to Navigation
Search
Create It Yourself logo
Art Supplies and Crafts surrounding Create it Yourself logo.

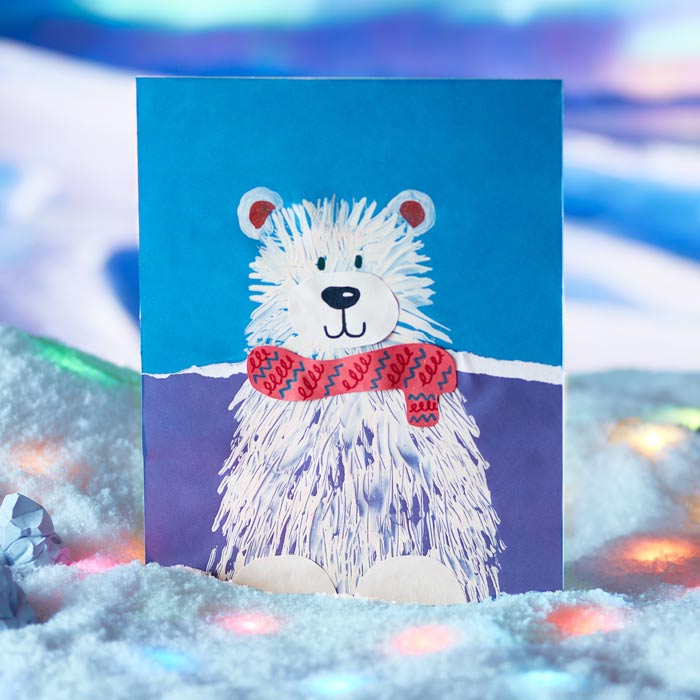
Polar Bear Fork Painting

Crayola CIY_Polar Bear Fork Painting_Poster Frame
Loading Color Wheel

Bear-y cool! Put your paws together & make this polar bear craft using a fork painting technique.

Steps:

Show Images
1
Crayola CIY_Polar Bear Fork Painting_Step 01

1 Tear piece of cardstock in half horizontally.

2
Crayola CIY_Polar Bear Fork Painting_Step 02

2 Glue torn cardstock piece to bottom half of another cardstock sheet.

3
Crayola CIY_Polar Bear Fork Painting_Step 03

3 Pour paint onto disposable plate.

4
Crayola CIY_Polar Bear Fork Painting_Step 04

4 Lightly dip fork in paint and press on cardstock repeatedly to create polar bear head and body.

5
Crayola CIY_Polar Bear Fork Painting_Step 05

5 Use paint brush to create solid ears. Let all paint steps dry 1–2 hours.

6
Crayola CIY_Polar Bear Fork Painting_Step 06

6 Sketch and cut out paws, snout, and scarf on construction paper.

7
Crayola CIY_Polar Bear Fork Painting_Step 07

7 Glue paws, snout, and scarf to polar bear.

8
Crayola CIY_Polar Bear Fork Painting_Step 08

8 Add face, paw, and scarf details with markers.

9
Crayola CIY_Polar Bear Fork Painting_Step 09

9 Display the frosty fork painting made with your bear hands!

CIY Staff Tips:

  • In step 8, ensure paint is completely dry before adding marker details.

Back to top