Australia
 Belgium
 Canada
 China
China Italy
Italy Mexico
 Netherlands
 UK
UK France
 Japan
Japan


Signature DIY Hanging Planter

Great to give or keep, these DIY Planter Pots with faux succulents are made in 60 minutes or less! Plus, the main supplies you need are all in a Signature Craft Kit.

- Tools: Paint, Air Dry Clay
- Theme: Rainy Day Crafts
- Age: 8+, Tween+, Adult
Steps:

1 Open a pack of air dry clay and roll into a smooth ball.

2 Push your thumb into the center to make an opening.

3 Rotate the ball in your hand and keep pressing out to widen the opening.

4 When the sides and bottom are about 1/4" and 1/2" thick, smooth out small cracks or rough edges with a drop of water on your fingertip.

5 Once you like your pot shape, punch a hanging hole through each side using the end of the paint brush. Hole should be 1/4" from the top. Add texture with the end of the paint brush if desired.

6 Air dry pot 24 hours until hard (longer if walls are very thick). Decorate with acrylic paint and let dry 3–4 hours before handling.
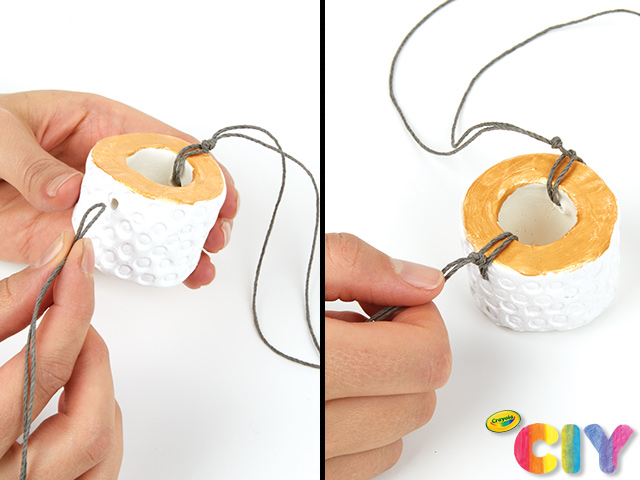
7 Cut a 6’ length of string in half. Fold each in half. Push folded half through holes so loop is inside the pot. Draw both cut ends through loop and pull tight.

8 Knot the 4 cut ends at the top and trim. Fit a plant inside the pot opening. Repeat steps 1–7 to make your other 2 planters. Use your skills to make different shapes and decorations!
CIY Staff Tips:
- Before starting, protect all work surfaces and clothing.
- While shaping each planter, place the desired succulent in the opening to see if it sits evenly on the rim. Adjust opening size if needed.
- Acrylic Paints are permanent when dry. Wipe up any paint spills when still wet.
- Use only plants provided or other artificial greenery in your planters. Do not use with soil or water – planters are not waterproof.
- If needed, get some help to hang the planters.