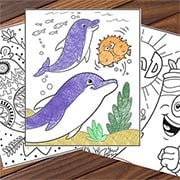
Crayola® Crayons are made primarily from paraffin wax and color pigment. We do not recommend making candles using Crayola Crayons. They have not been tested or approved for this type of use. For craft ideas regarding melted crayons, please visit the DIY Crafts of our website, or to inspire creativity in children of all ages, check out our free, printable Coloring Pages.
If you have additional questions, we would love to hear from you! Feel free to call or text us at 1-800-CRAYOLA weekdays between 9 AM and 4 PM Eastern Time. If you would prefer to send us an email, visit our contact us page.
Related Questions
Explore answers to common questions, helpful stain removal tips, and creative ideas for making the most of our art supplies and free resources!
-
Learning a new technique can take practice, but we have some tips that can help. the harder and faster you pull the ripcord, the longer it will spin. Aim the marker tip close to the paper and keep the Colourwhirl parallel to the surface before launching it for a more controlled and steady spin.
Access a demo video and download instructions at www.crayola.com/colourwhirls
-
The basic ingredients contained in Crayola® Crayons are paraffin wax and color pigment. These ingredients are the same for all Crayola Crayon colors, with some modifications in special effects crayons.
Crayola Crayons begin to melt at around 105° Fahrenheit and have a melting point between 120° - 147° Fahrenheit. The melting point is the same for all regular Crayola Crayons; however, the density and amount of pigment included in different crayons will result in varying thickness or viscosity of the mixture.
-
Follow these tips for melting crayons:
1. Only use Crayola Crayons
2. Only melt three crayons at one time
Also, if multiple cycles are needed to fully melt the crayon wax, the metal melt tray (where you place the broken crayons) may not be fully snapped into place. This causes the tray to sit unevenly on the heat plate which in turn causes the crayons to melt unevenly. To secure the tray, follow these steps:
1. Make sure unit is cooled, turned off and unplugged.2. Lift plastic lid.
3. Remove the melt tray by pushing it back and sliding it up and out of the pivot supporters.
4. Begin sliding the tray back into the pivot supporters, making sure to slide the tray underneath the Yellow Pour Control Tab.
5. Use some force to push each tab into the rounded joints. You’ll hear a loud click as you press one side in and then the other. This click ensures the tray is properly in place. The tray should rest directly on the heating unit with no space in between.
6. Once secured, turn the Pour Control Knob a few times to make sure the melt tray moves freely up and down.
Need a visual? Check out our new demo video on YouTube:
-
Decorating sculptures made with Crayola® Air-Dry Clay is fun and easy!
- Paint: Thoroughly dry pieces may be painted with tempera, acrylic, or watercolor paint
- Markers: Non-Permanent & Washable Markers may not provide optimal coverage if you are coloring a large area of clay since the clay tends to clog the marker nib. Permanent pigment-based markers work well for writing words on the clay.
- Glitter Glue can be used to decorate dry artwork.
Other product suggestions: pigment-based stamping pads and metallic powder pigment embellishments.
If you have additional questions, we would love to hear from you! Feel free to call or text us at 1-800-272-9652 on weekdays between 9 AM and 4 PM Eastern Time. If you would prefer to send us an email, visit our contact us page.
-
We offer stain removal suggestions for both Crayola and Silly Putty products. You can find this information by going to Stain Removal.
Specifically, the suggestion for removing Silly Putty from fabric is as follows:
How to remove Silly Putty® and Clay from fabric
Cleaning Materials:
- Dull knife or metal spoon
- Rubbing alcohol
- Cotton balls
- Ice cubes
- Liquid dish soap (preferred: Dawn or Joy)
Procedure:
Scrape off as much putty as possible. Use ice cubes to chill the putty making it easier to scrape away. Saturate a cotton ball with rubbing alcohol and blot the stained area. If stain persists, rub liquid dish soap into the stain and wash as normal. Repeat as needed.
Please bear in mind, all the stain removal suggestions we offer have been tested in our laboratory, but we are unable to guarantee the results. We recommend you test our suggestion in an inconspicuous area first.